¶ How to easily lift the Aurora badge
You can use a piece of duct tape to lift the badge up when you want to change it.
![]()
¶ How to use VIA
¶ VIA Overview
A comprehensive guide on how to take advantage of powerful QMK features through VIA is outside the scope of Aurora documentation.
We strongly recommend you to watch this tutorial by Austin V if you want to learn how to use VIA.
Please see the Troubleshooting Guide if VIA does not detect your QMK PCB.
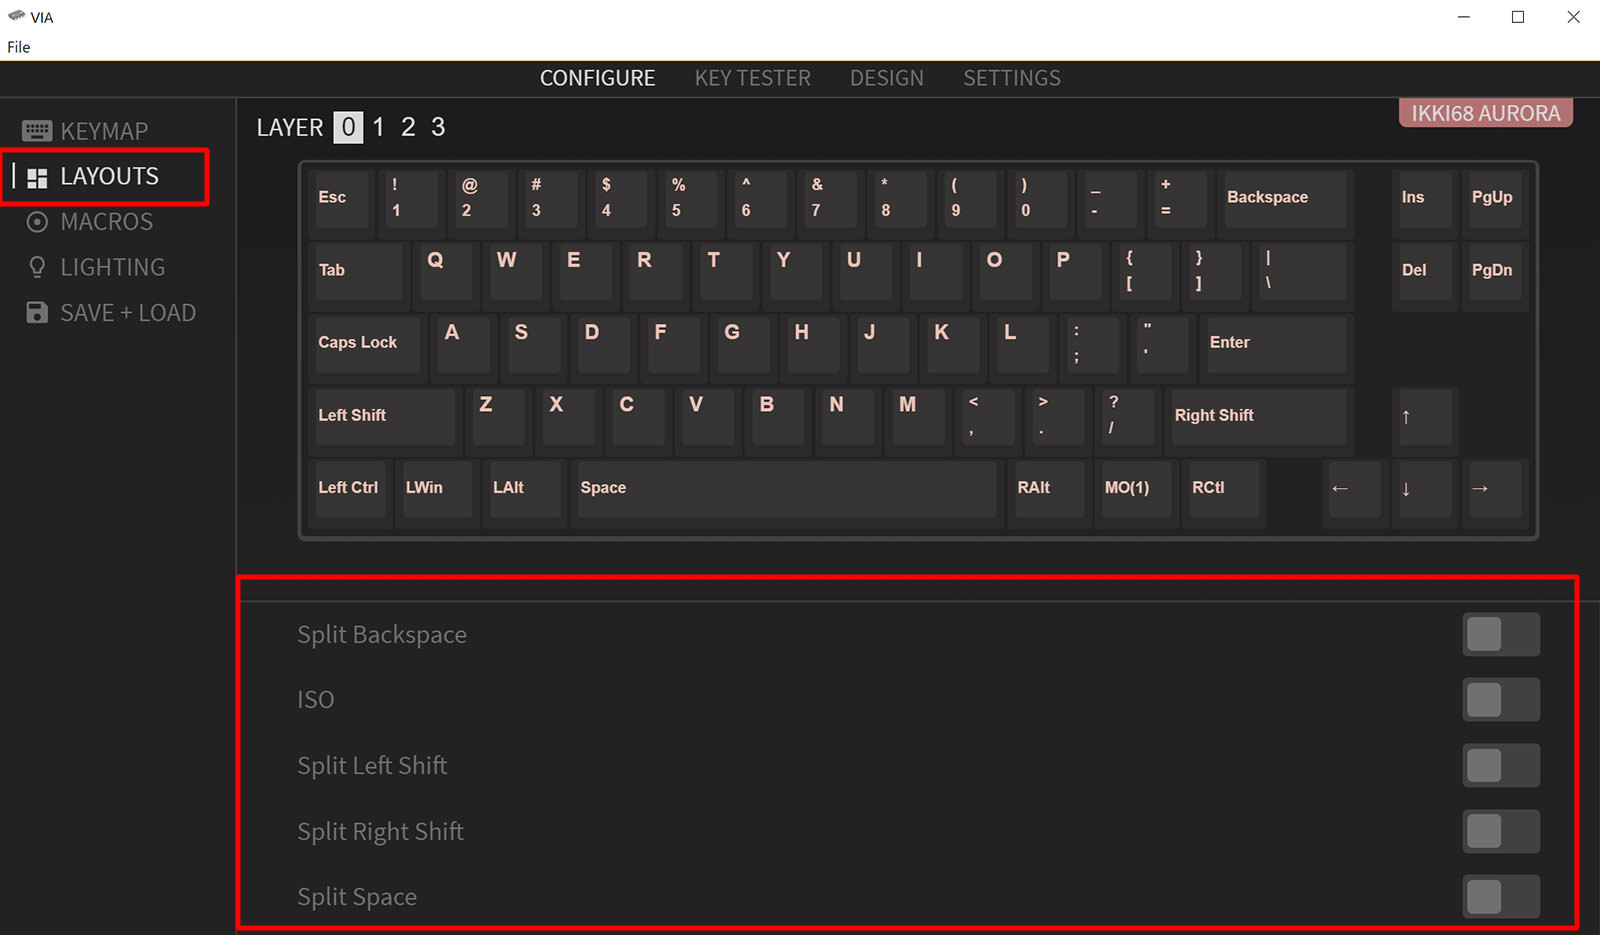
¶ How to configure VIA for multi-layout PCBs
Aurora QMK PCBs can support multiple layouts. If you are using a layout other than the standard one, you need to enable support for it from the Layouts tab.
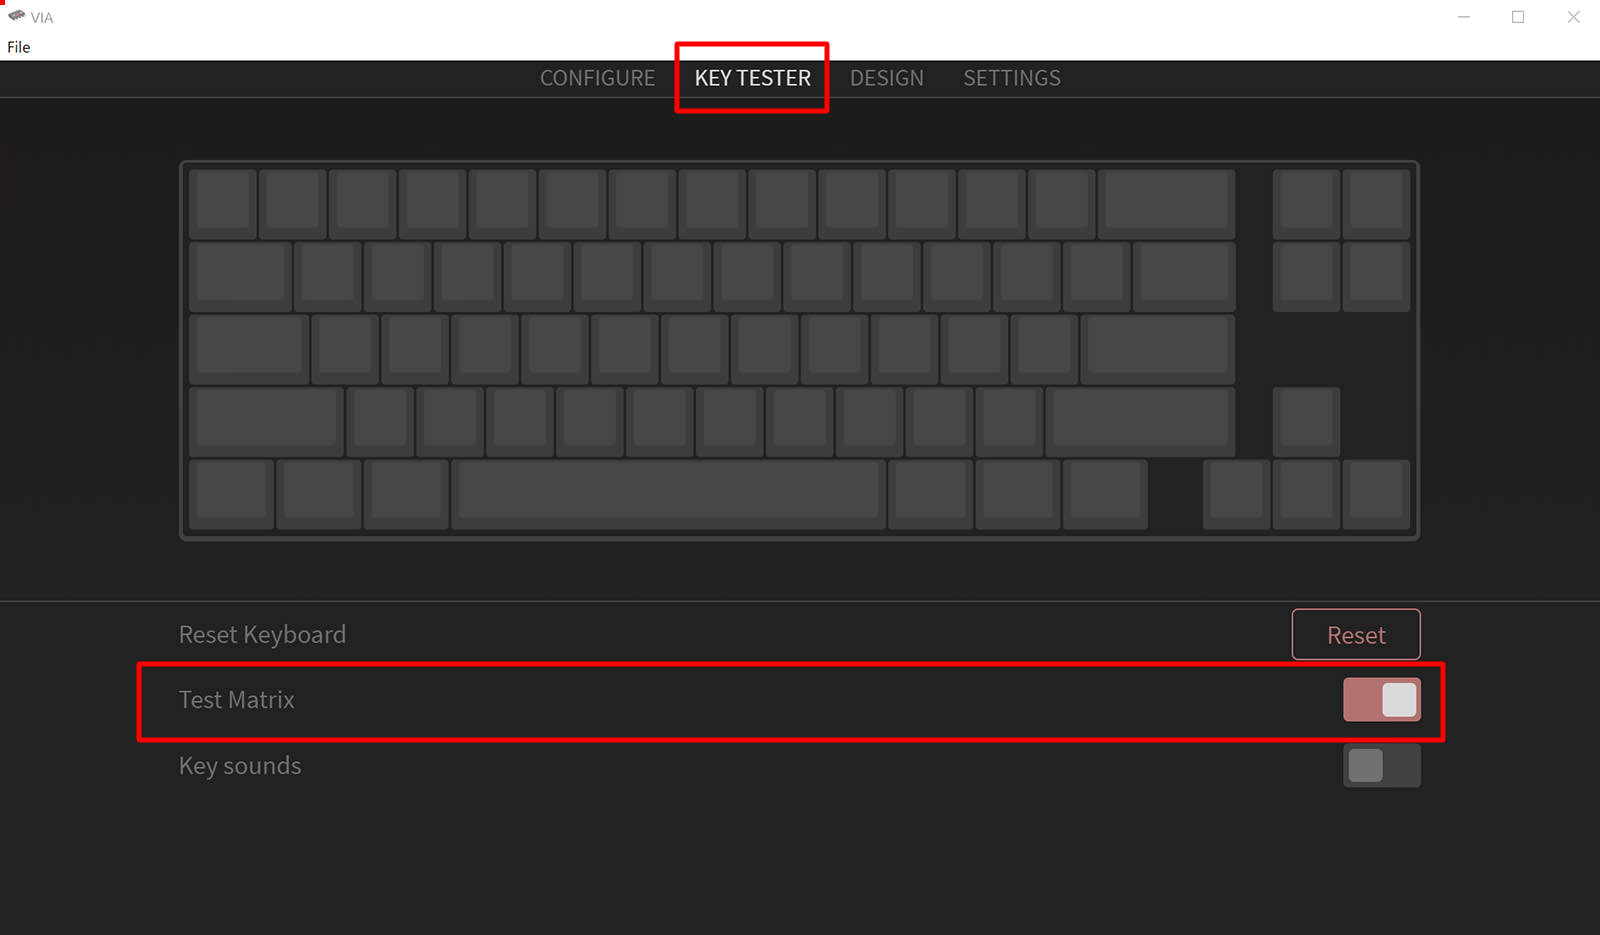
¶ How to customize VIA Key Tester to show only the keys in your layout
Make sure you have Test Matrix checked.
¶ How to use VIA to test PCB
Refer to the following video by StrangetownFunk to learn how to test a PCB with metal tweezers. You can use VIA Key Tester mentioned above instead of the website in the video.
¶ How to flash a QMK Firmware
-
Download QMK Toolbox. Download the latest stable release, not beta. You can choose an installer or a portable installation, doesn't matter.
-
Download the appropiate QMK firmware for your PCB from the Firmware and Files page. The default PCB that comes with every Aurora is Fairbanks.
-
Open QMK Toolbox. If it asks you to install drivers, let it do so.
-
Load the QMK firmware you downloaded in (2) and leave everything else unchanged.
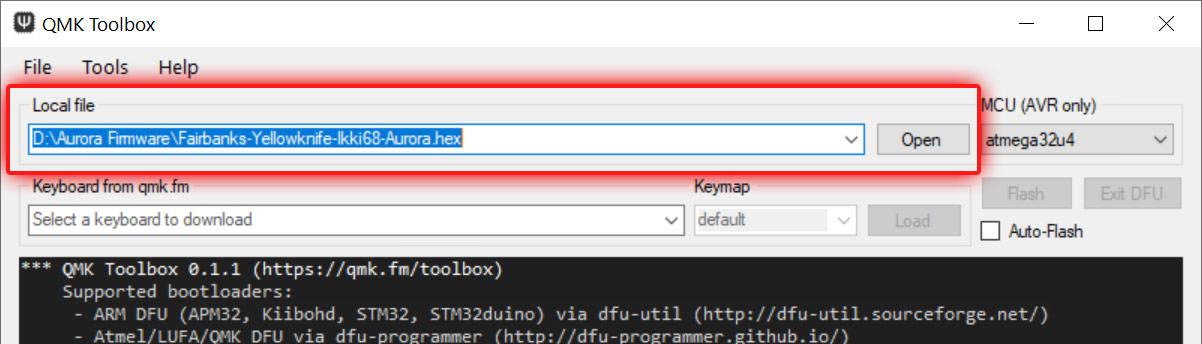
- Press Fn + Home to bring your keyboard into bootloader mode. No keypresses will register when it's in bootloader mode.
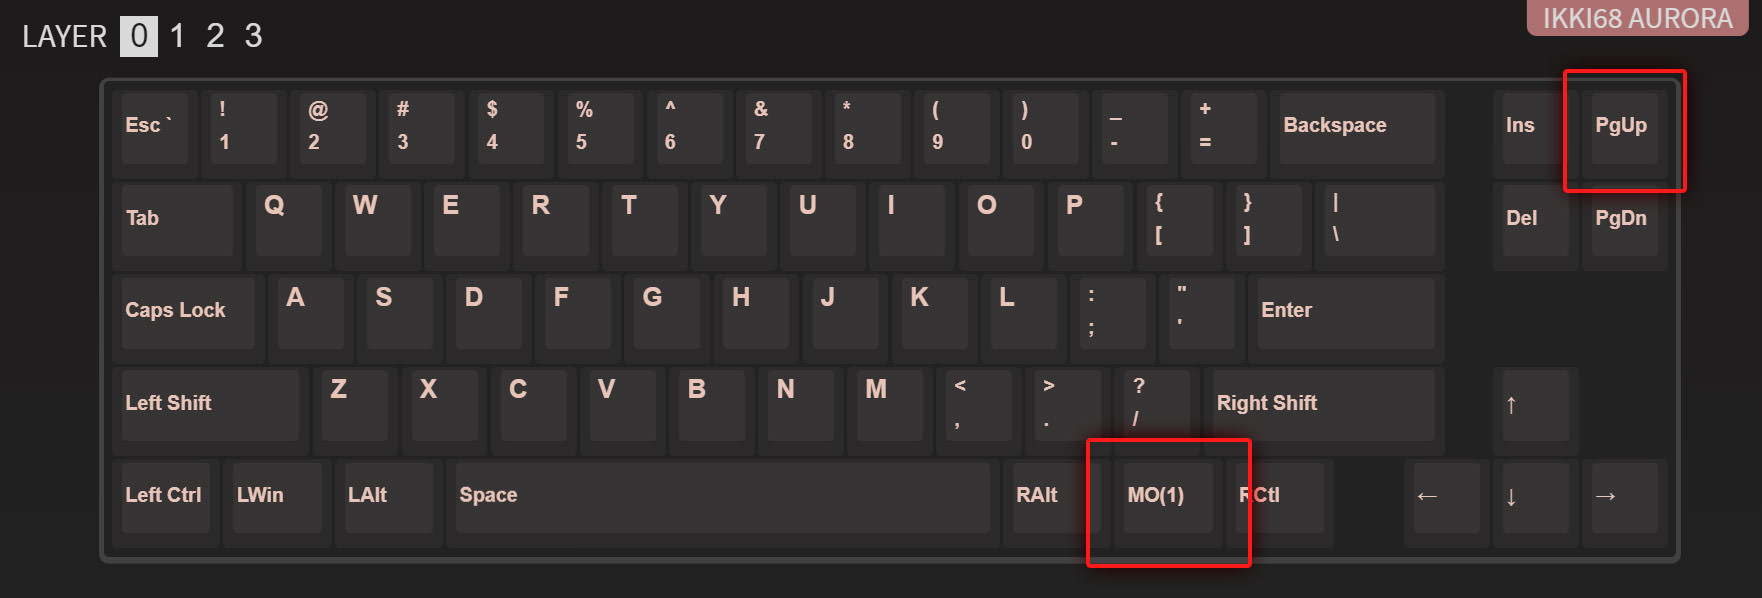
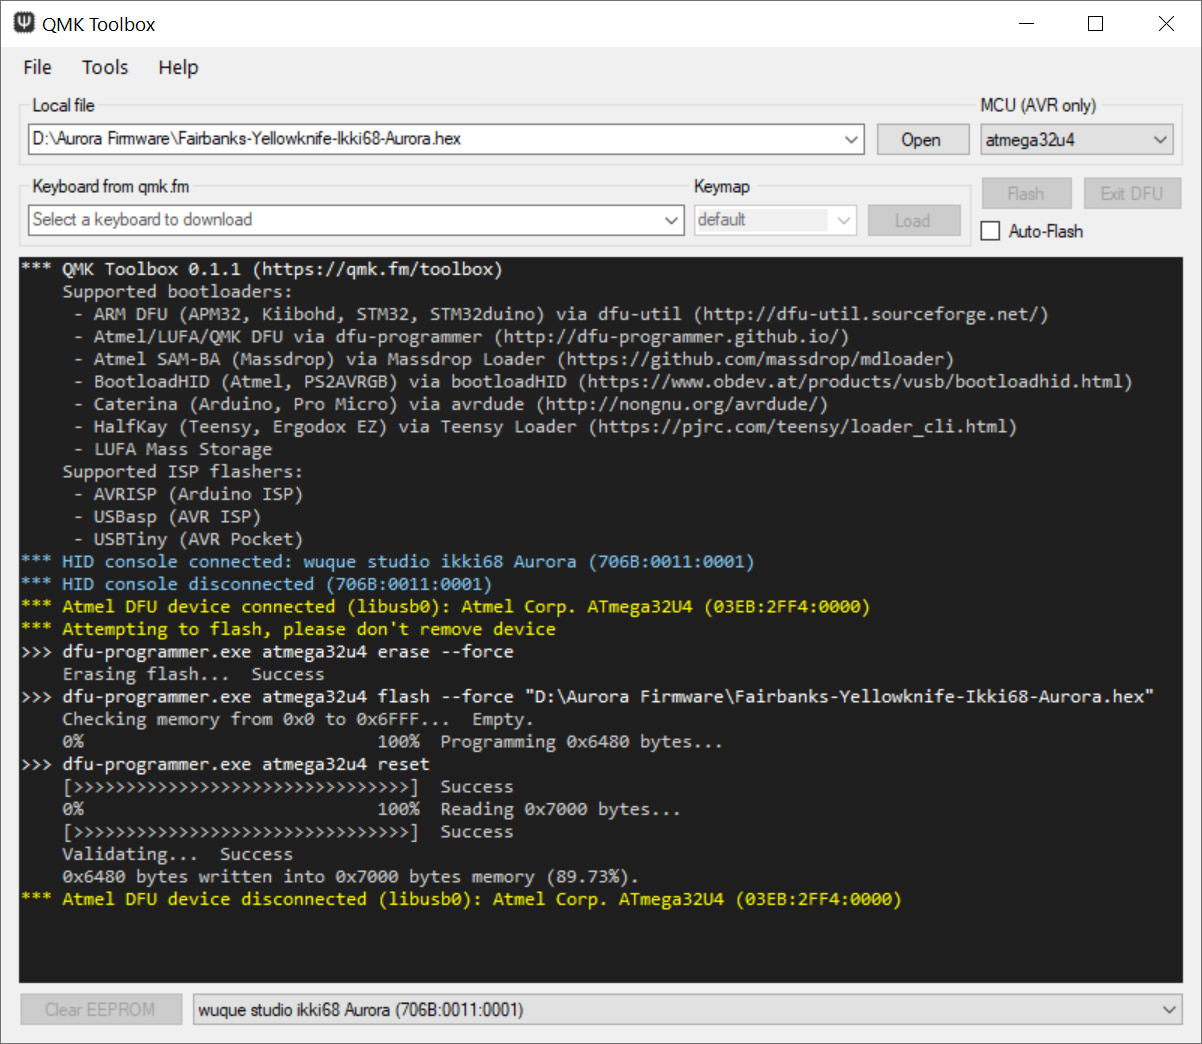
Once the keyboard is in bootloader mode you will see this yellow line:

- If you're flashing because of a PCB problem, please make sure to click "Clear EEPROM" at this stage. It'll take a few seconds to do so. When it's done it'll say "Please reflash device with firmware now".

- Click flash. After it's done flashing it will bring the keyboard out of bootloader mode and you'll be able to use it again.
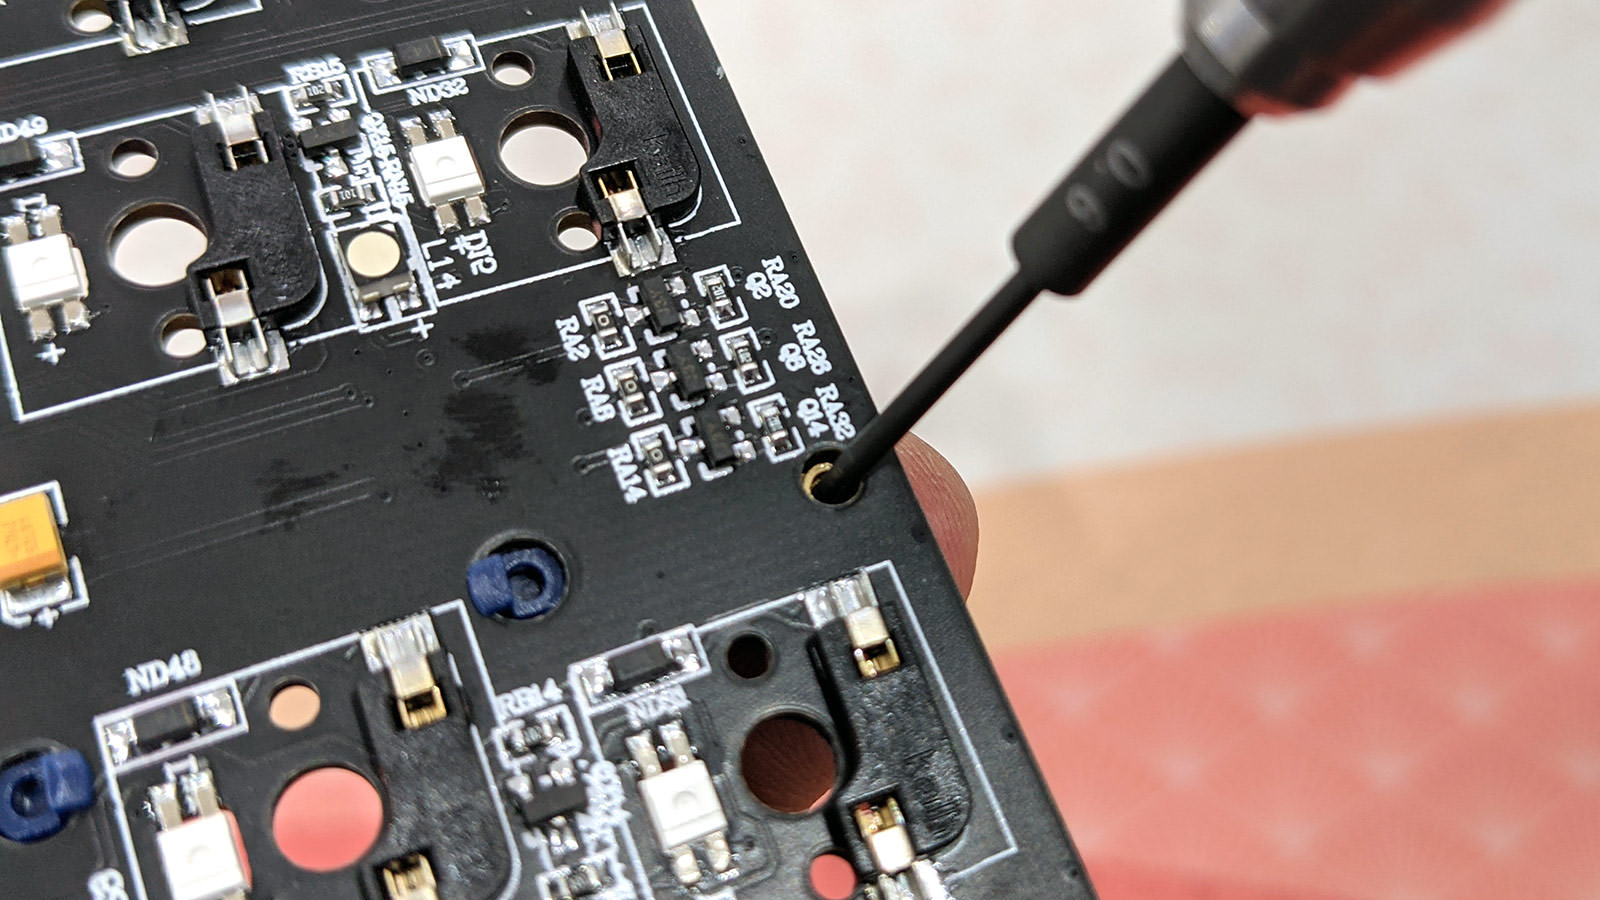
¶ How to fit a stabilizer a hair too big on the PCB
If you find stabilizers fitting a little tight on the board, use a screw driver from the other side of the PCB to guide the stabilizer end to the hole.